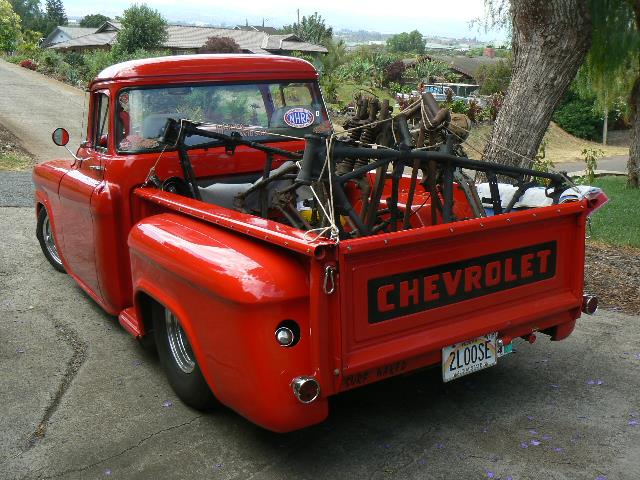
Loaded 'em in my old truck and hauled off to my buddy's shop ( I built up this '59 truck 10 years ago, drive it every day, not afraid to work it hard!)....
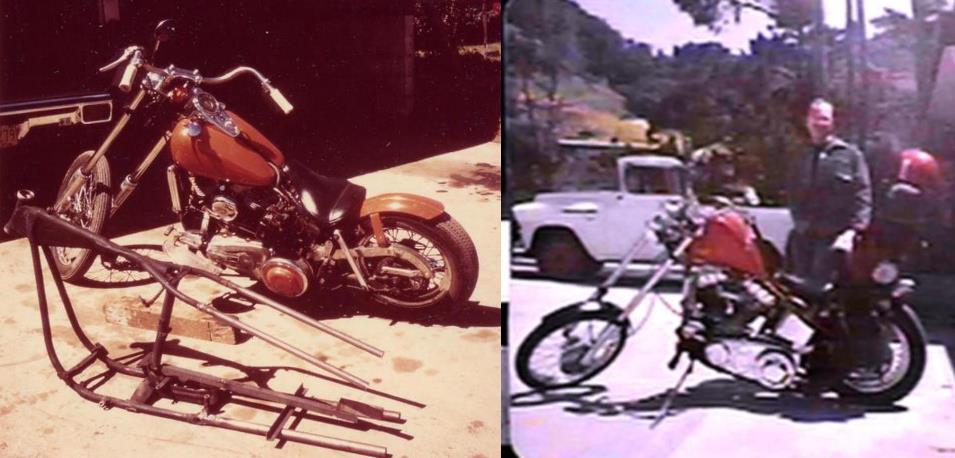
I've had this '62 since '68, originally it was a Honolulu cop bike, got it from a guy who bought it at the PD auction... Always wanted to do a chop, so first thing I did was strip it down and did my own hardtail on it, didn't want to cut the neck, so put on 16" over legs on the glide, and dropped the rear end down as low as I could. It has always handled well and never given me problems. The first pic below shows the original build, that's my '59 in the background, it's apart right now and is another project waiting to happen. I do have solid plans for it. The '62 has been rebuilt twice since then, but is essentially like this original pix taken nearly 40 years ago during a long mainland trip....
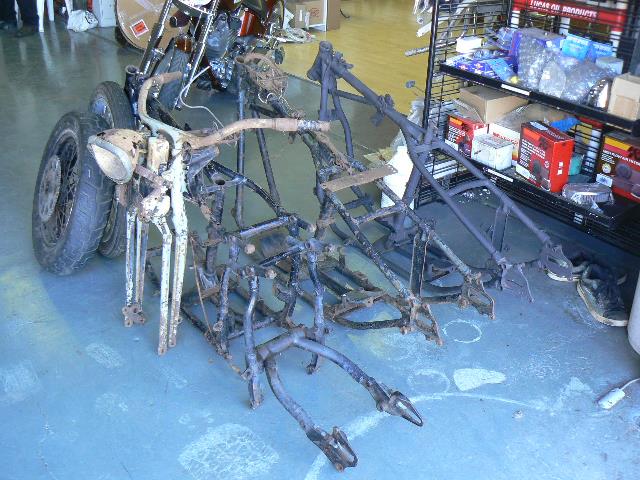
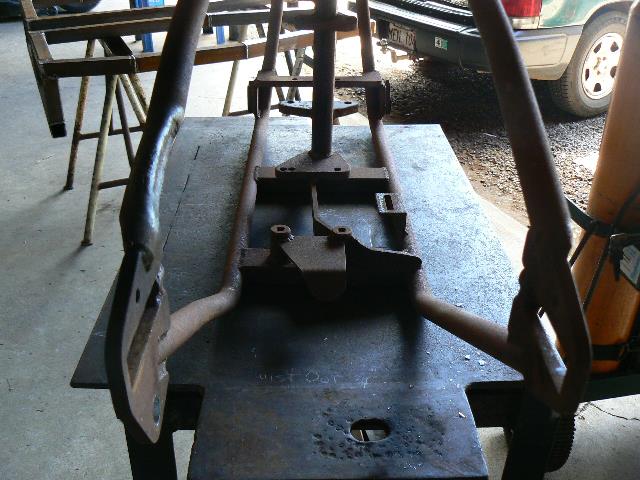
A long time ago, I don't remember for sure, 20-30 years, I bought a Denver's frame to rebuild my bike on, keeping all the parts I'm running now and was running back then. Kept that frame, it is in new, unused condition, so time I did what I intended way back then!
My buddy the shop owner had this original springer, extended about 14" using model A radius rods, old style, he offered it to me it to try on my Denver's frame, it looks like it belongs there....
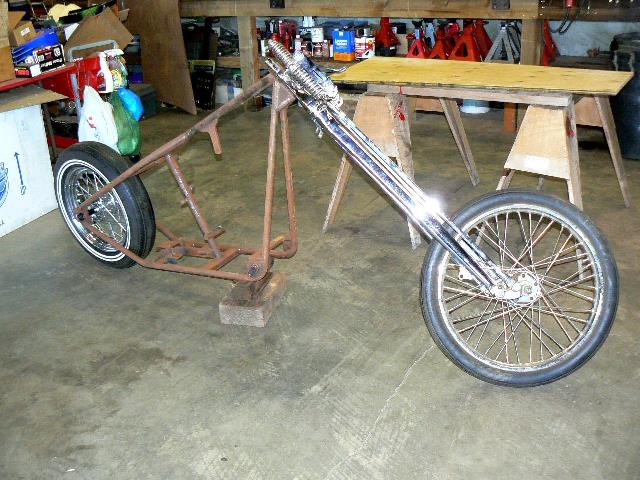
I ordered the bearing cups and bearings for the neck for this front end, and started moving parts over from the original frame to this one. As I was fitting the drum brake to the rear of this frame I ran into a couple of simple problems that needed some attention....
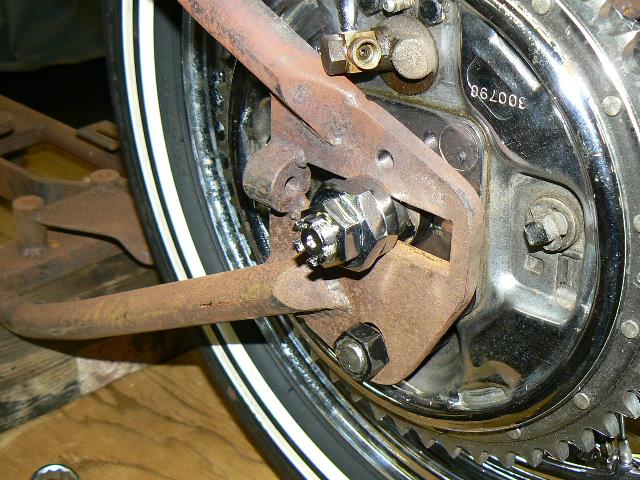
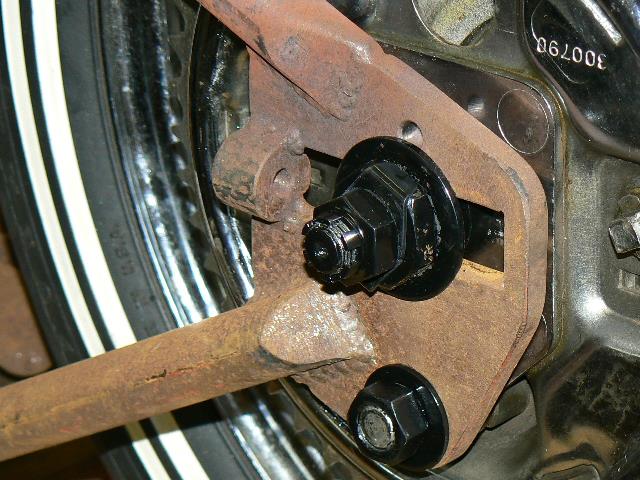
First problem was the brake backing plate where it was hitting the top frame tube and wouldn't align properly. A torch and a hammer and clearances were made for that through the whole chain adjustment range. I'll clean this up when I prep the frame for paint:
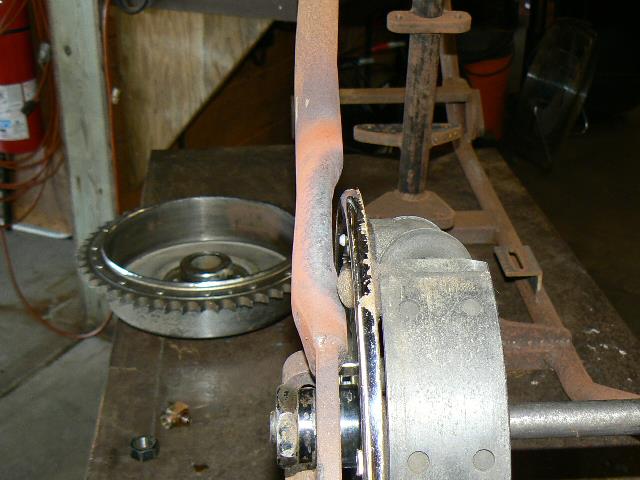
The second problem was the brake anchor hole, it was just a round hole, which limited adjustment for chain wear, and needed to be "slotted" vertically a bit to allow the proper adjustment to the brake anchor bolt when the axle is moved forward and back for chain wear adjustment. A rat tail file of the right size and some elbow grease and that was done:
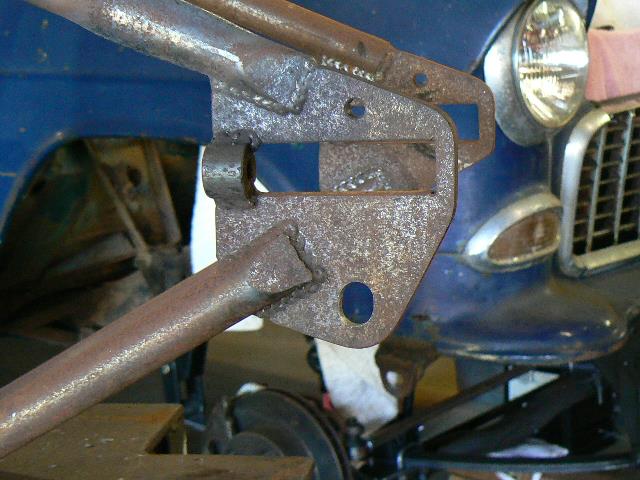
The third problem here was the juice brake line connection. I usually route these up along and under the bottom frame rail and loop it behind the axle and connected with enough slack in the brake line to allow unimpaired axle adjustment. But the forward position of the brake line fitting on the wheel cylinder hits the top tube on this frame. On my old frame I had addressed this by welding in the top tubes lower on the axle mount plates. On this one I will need to plug that forward threaded hole in the wheel cylinder and drill and tap the rear boss, face off the boss for a good fit for the fitting, and put it back on with a rear juice line connection.
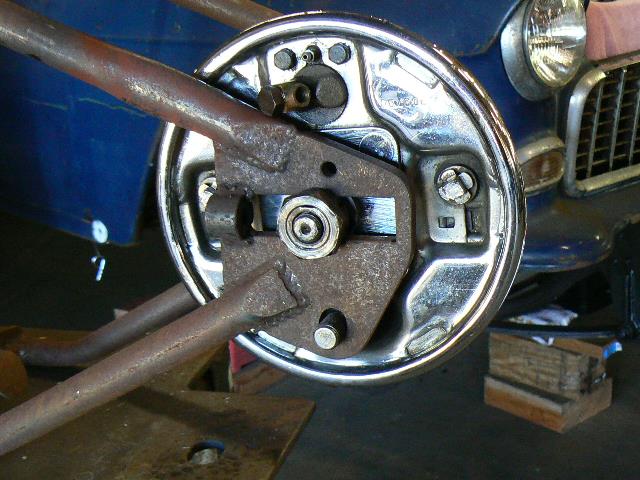
The last problem I ran into is that these axle mounting flanges are thicker than stock, and the axle is a little short to get full thread engagement with the axle nut.
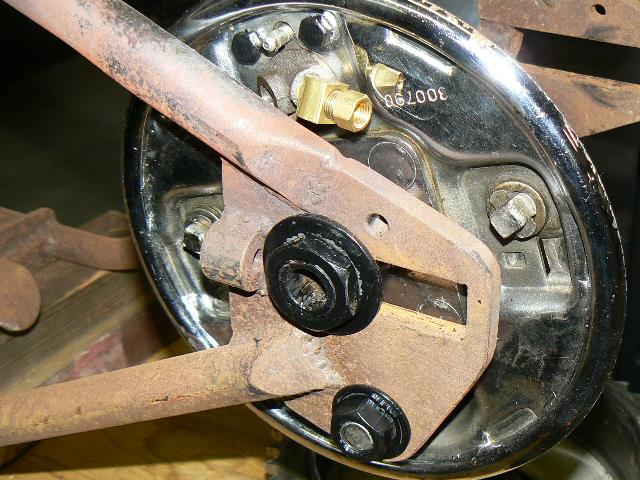
Several options here, like changing the spacers between the inside of the flanges and the brake/wheel setup, and narrowing the rear frame legs slightly, but I opted to change the setup on the outside of the left flange. Instead of the stock size spacer under the brake mounting nut, I substituted a thinner but wider, heavy duty washer:
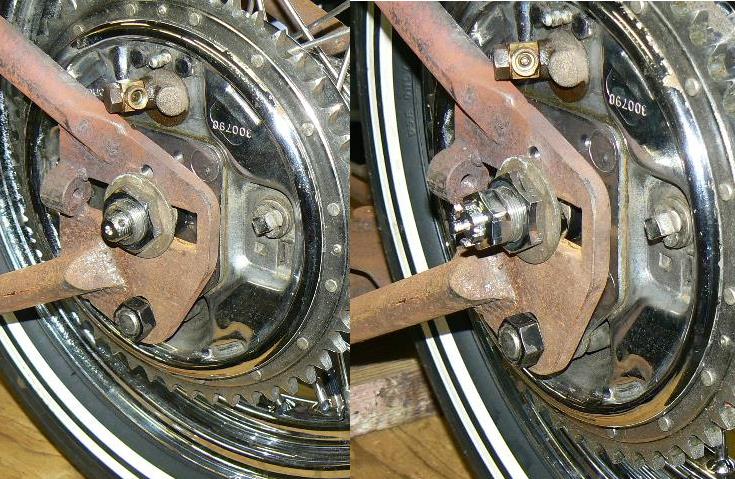
Now I can machine off about a 1/4" from the brake mounting bolt, that will give me plenty of thread to mount it, and enough thread on the axle to get full engagement with the axle mounting nut.
This is just an "eyeball" setup, but now I've got nice alignment on the rear tire and will have lots of adjustment available on the chain once I get that wheel cylinder machined for the new juice line fitting location.
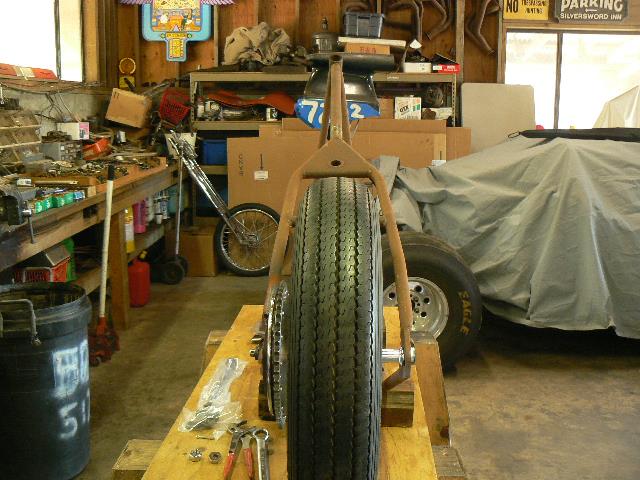
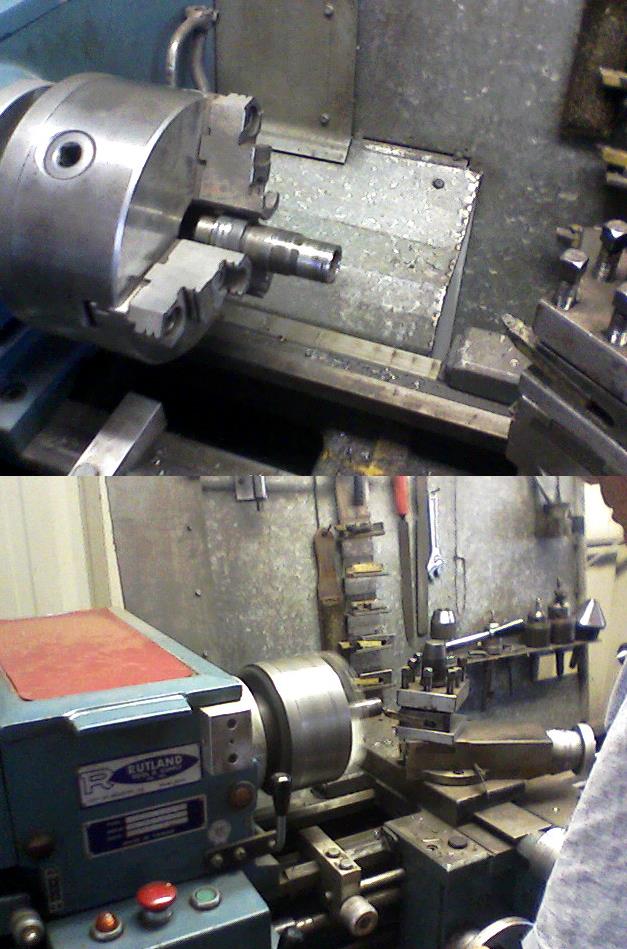
Did chuck the brake mounting shaft in a lathe and took off 0.2" on the threaded end, and ran the threads back another 0.2", which gave me the fit I needed, put it all together after the paint dried and it all looks good to go....
Now I need to drill, tap and relocate that rear brake cylinder hydraulic line fitting so that it clears the upper frame tube on that side.....
Finally located the correct fittings, got the wheel cylinder drilled and tapped, put a plug in the original hole, and now I can adjust the axle full forward if needed....
Chrome finishes rust up pretty fast over here, it's all the salt in the air, so I threw some black paint on these parts, doesn't stick all that well with time, but at least it protects it from rust !
More later......
Here's some links to more pix:
Moving Parts from the "Old Bike" over to the "New Bike" (Page Two)....
Still Moving Parts, (Page Three)
Rebuilding The Front Forks (Page 4)
Let's Get This Show On The Road (Page 5)
Splittin' The Cases, Bottom End Rebuild (Page 6)....
Gettin' That Motor Together.... (Page 7)
Here's some links to other projects:
LINK to the 2Loose '55 Gasser Home Page
